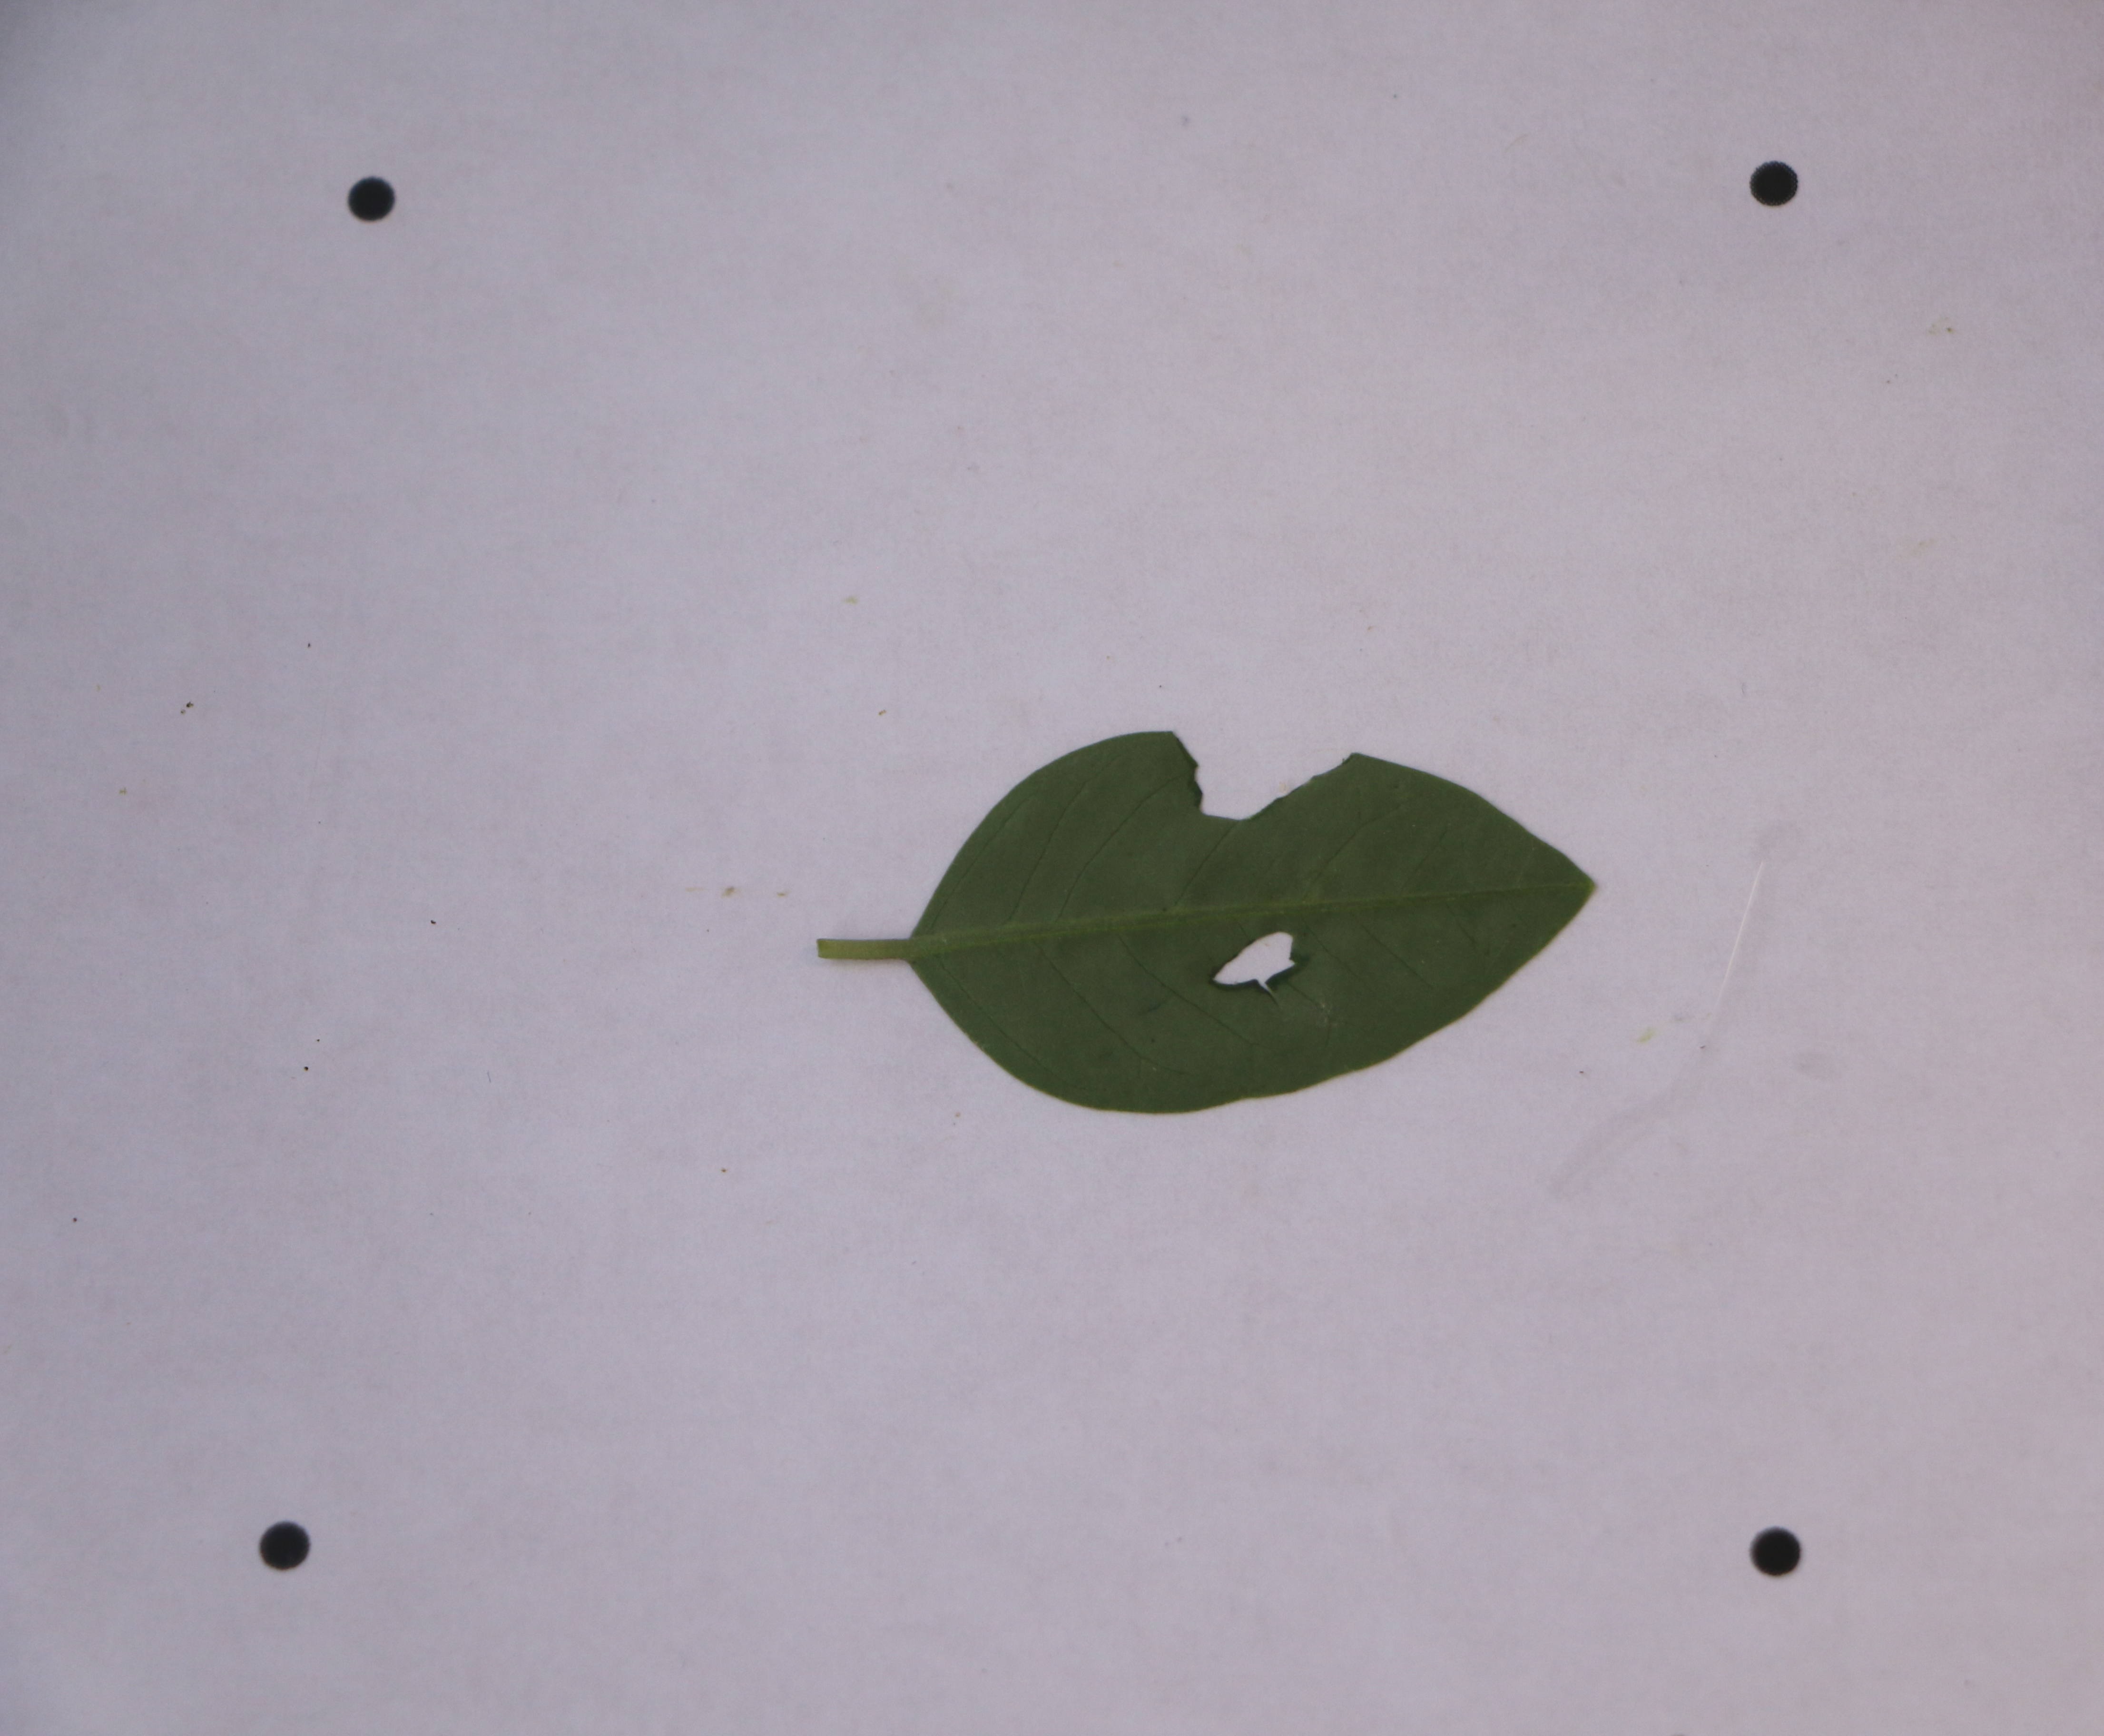
LeafByte is best used with images like you see here: a leaf on a solid, contrasting background without significant shadow. The leaf is surrounded by four dots in a square, which constitute the scale. The four dots give a frame of reference both for determining absolute areas in the image and for correcting the image if it was taken at an angle (LeafByte can also be used without the scale, but you won’t get absolute measurements or angle correction). The size of the scale is measured as the distance between two dots on the same side of the square, from dot center to dot center. You can download a document with scales of different sizes here, or make your own. Just be sure to measure it before use, and enter the size in the settings. For best results, don’t use a scale that’s excessively larger than your samples, or else the samples will take up a very small portion of your images and have poor resolution.
On the home screen, you can choose whether you want to use an image that already exists or take a new photo. Alternatively, you can configure various Settings for LeafByte in the top right (in particular, you should make sure you’re happy with the save locations before you gather real data) or begin a Tutorial in the top left.
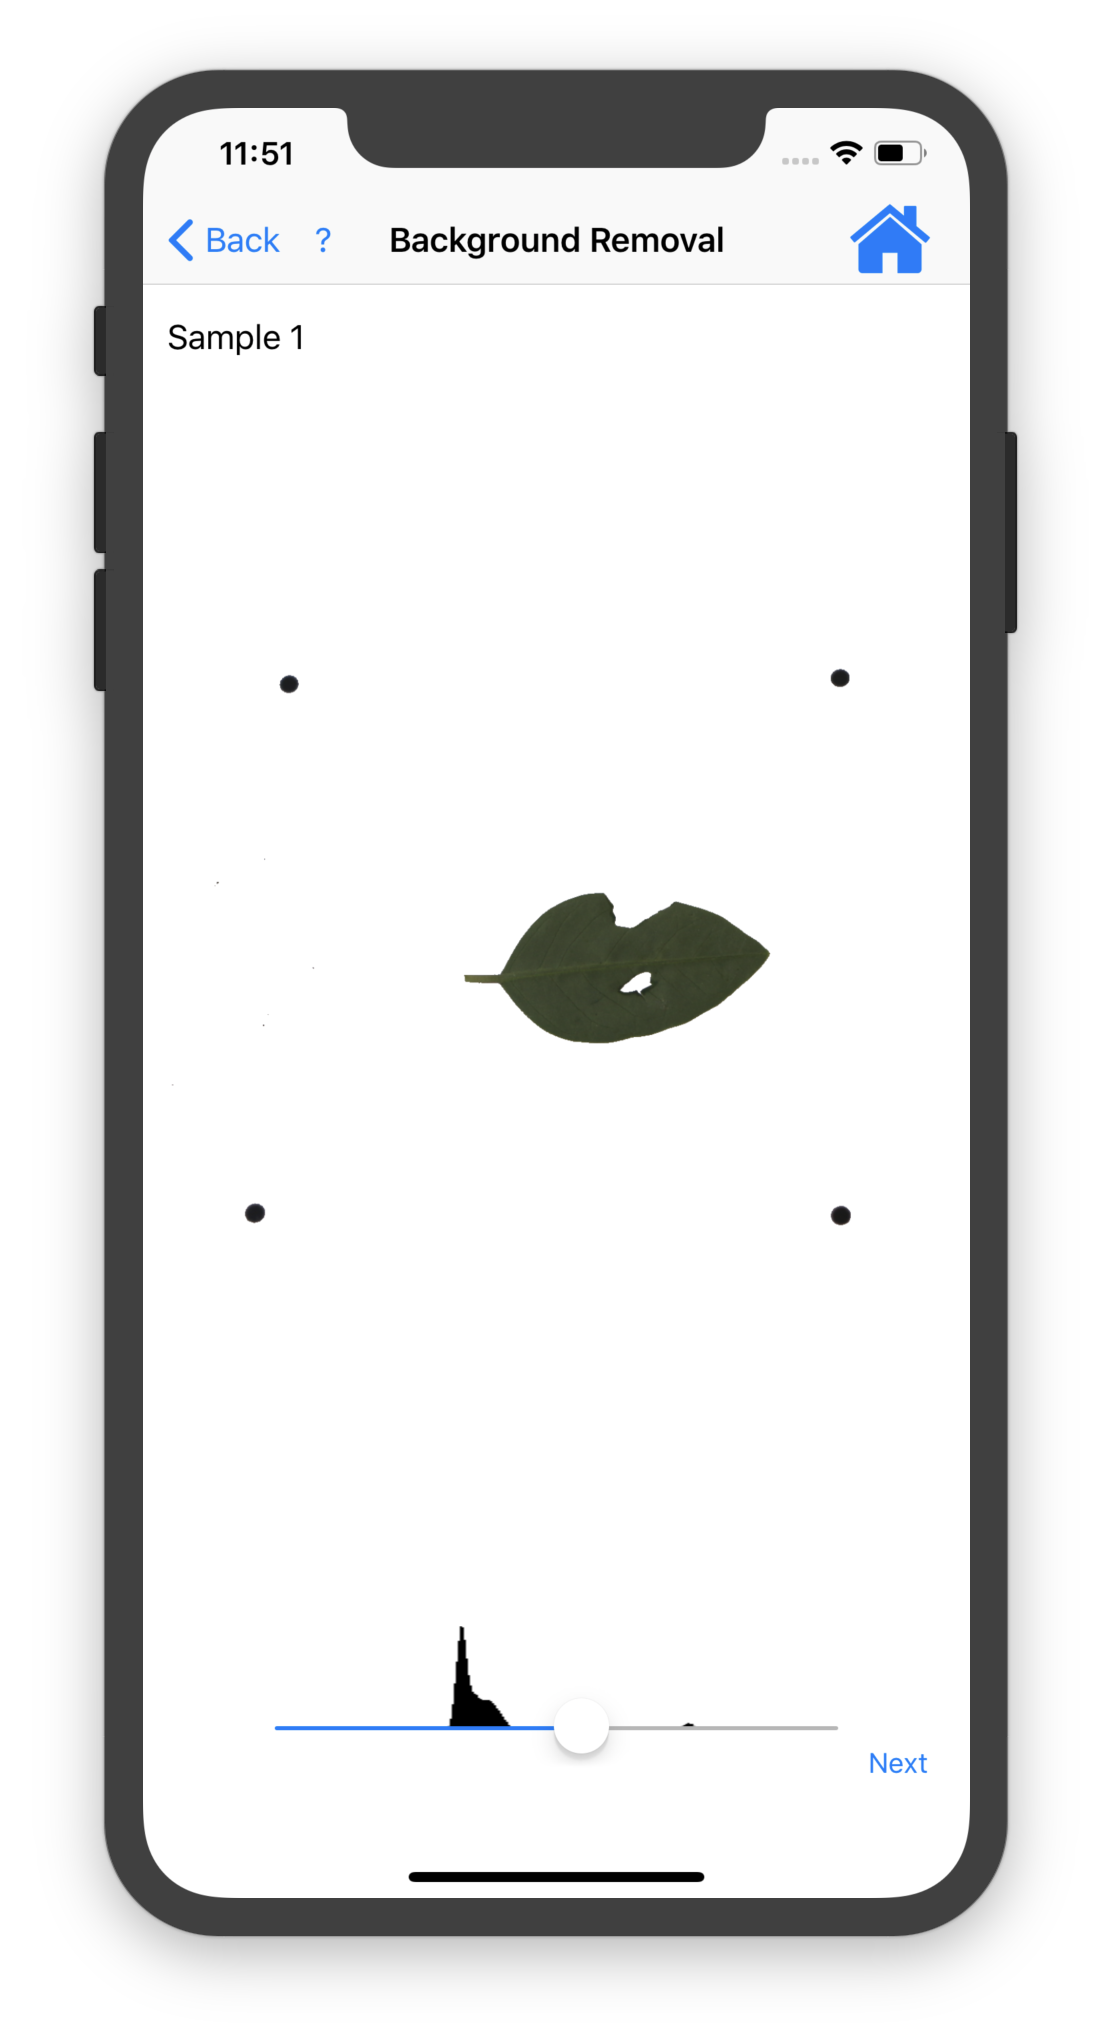
Background Removal
After choosing an image or taking a photo, you’ll begin with background removal. LeafByte will attempt to remove the background automatically. It’s generally effective if the leaf and scale are much darker than the background, but you can adjust the slider to tweak. If your image quality is poor, you may get a warning that the image is fuzzy, letting you know that the results may be imprecise.
What’s happening is that LeafByte is looking at a histogram of brightnesses in the image. You’d expect this histogram to be bimodal with a mode of bright spots, representing the background, and a mode of dark spots, representing the leaf and scale. LeafByte finds a brightness between the two and removes everything lighter. The slider is actually allowing you to adjust that cutoff point, and the histogram you see above the slider is that histogram of brightnesses. (Note that if you’ve chosen Use Black Background in the settings, this is all flipped.)
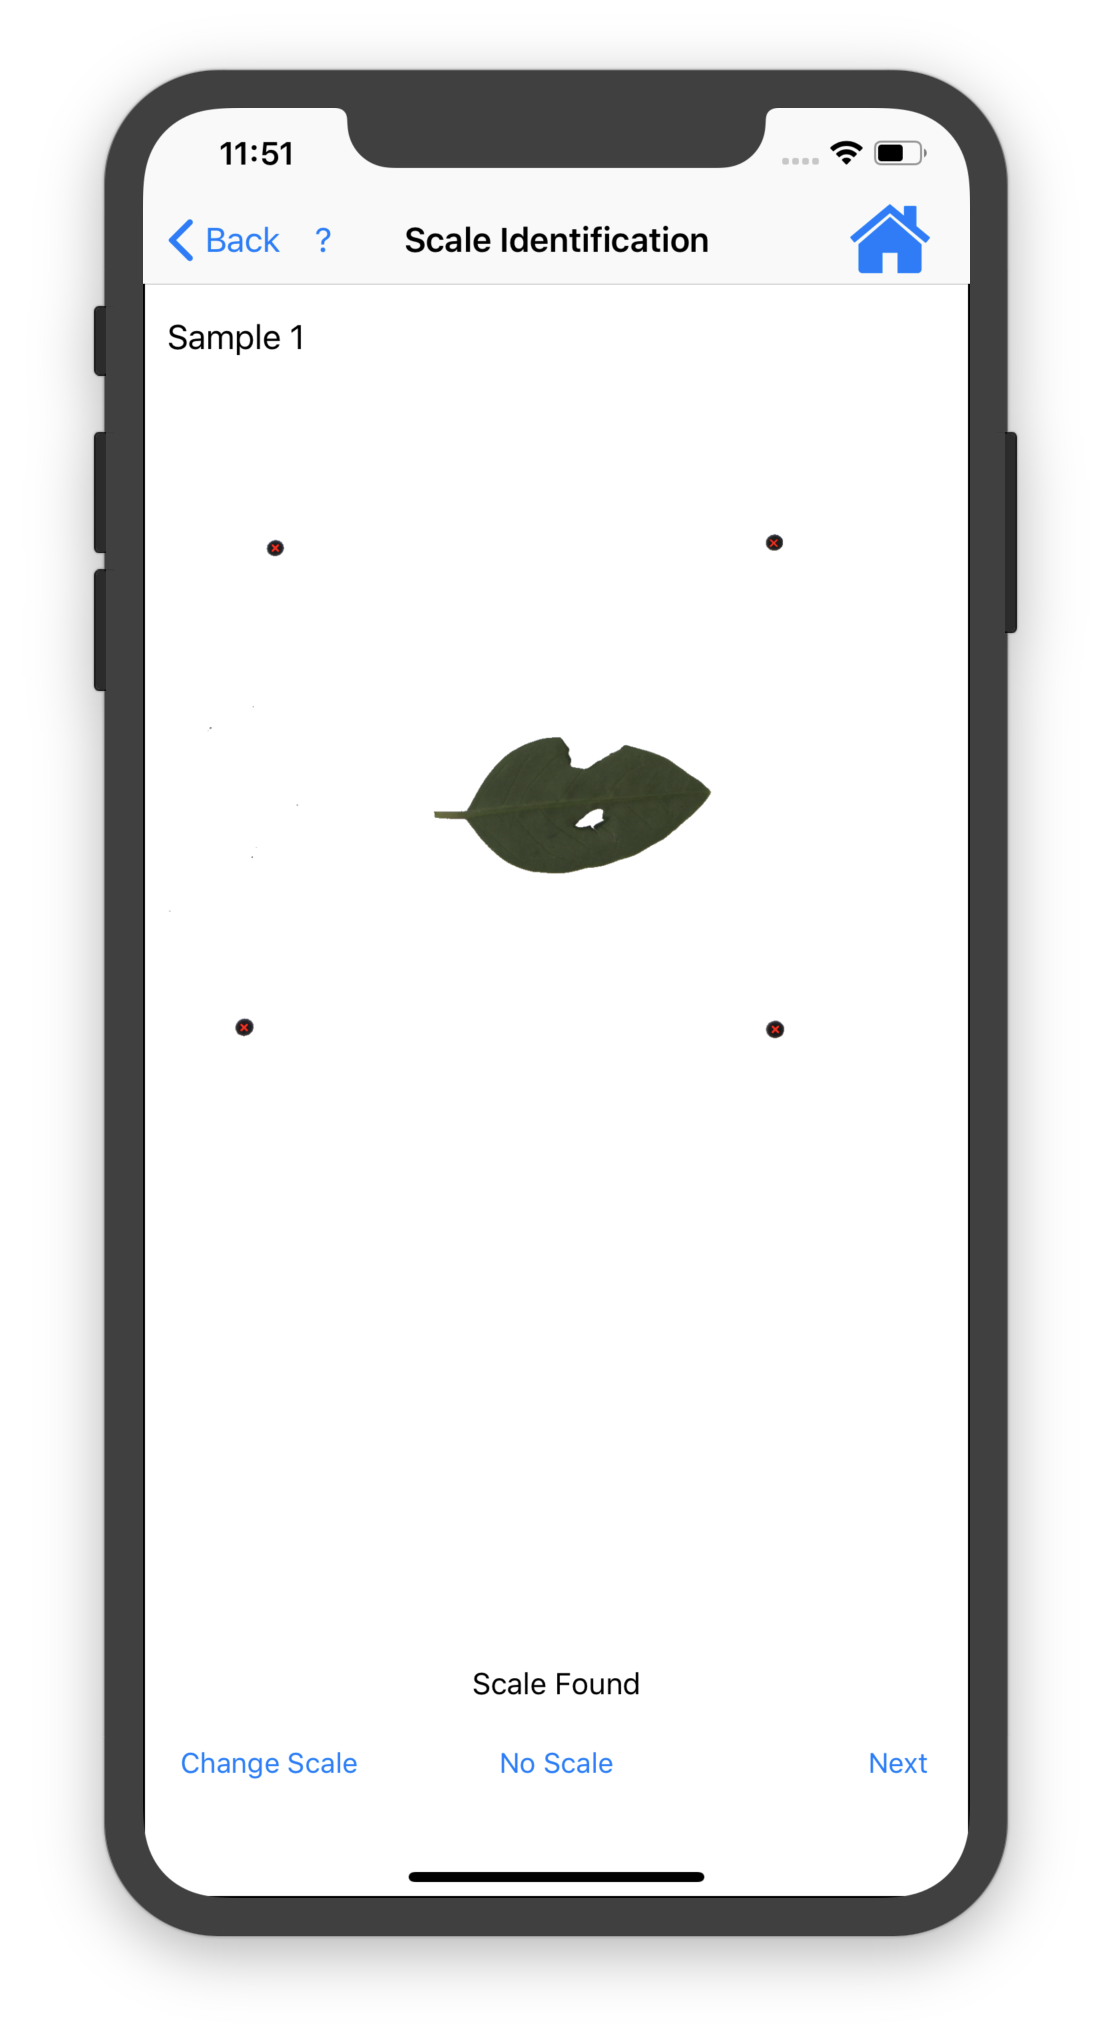
Scale Identification
Next is identifying the scale. LeafByte will automatically find all the shapes in the image and guess that the largest one is the leaf, and the next four largest are the scale dots. It’ll mark those four scale markings with red Xs. If LeafByte did not accurately identify your scale dots, you can touch Change Scale and then touch each of the four scale dots. If your image does not have a scale at all, you can touch No Scale.
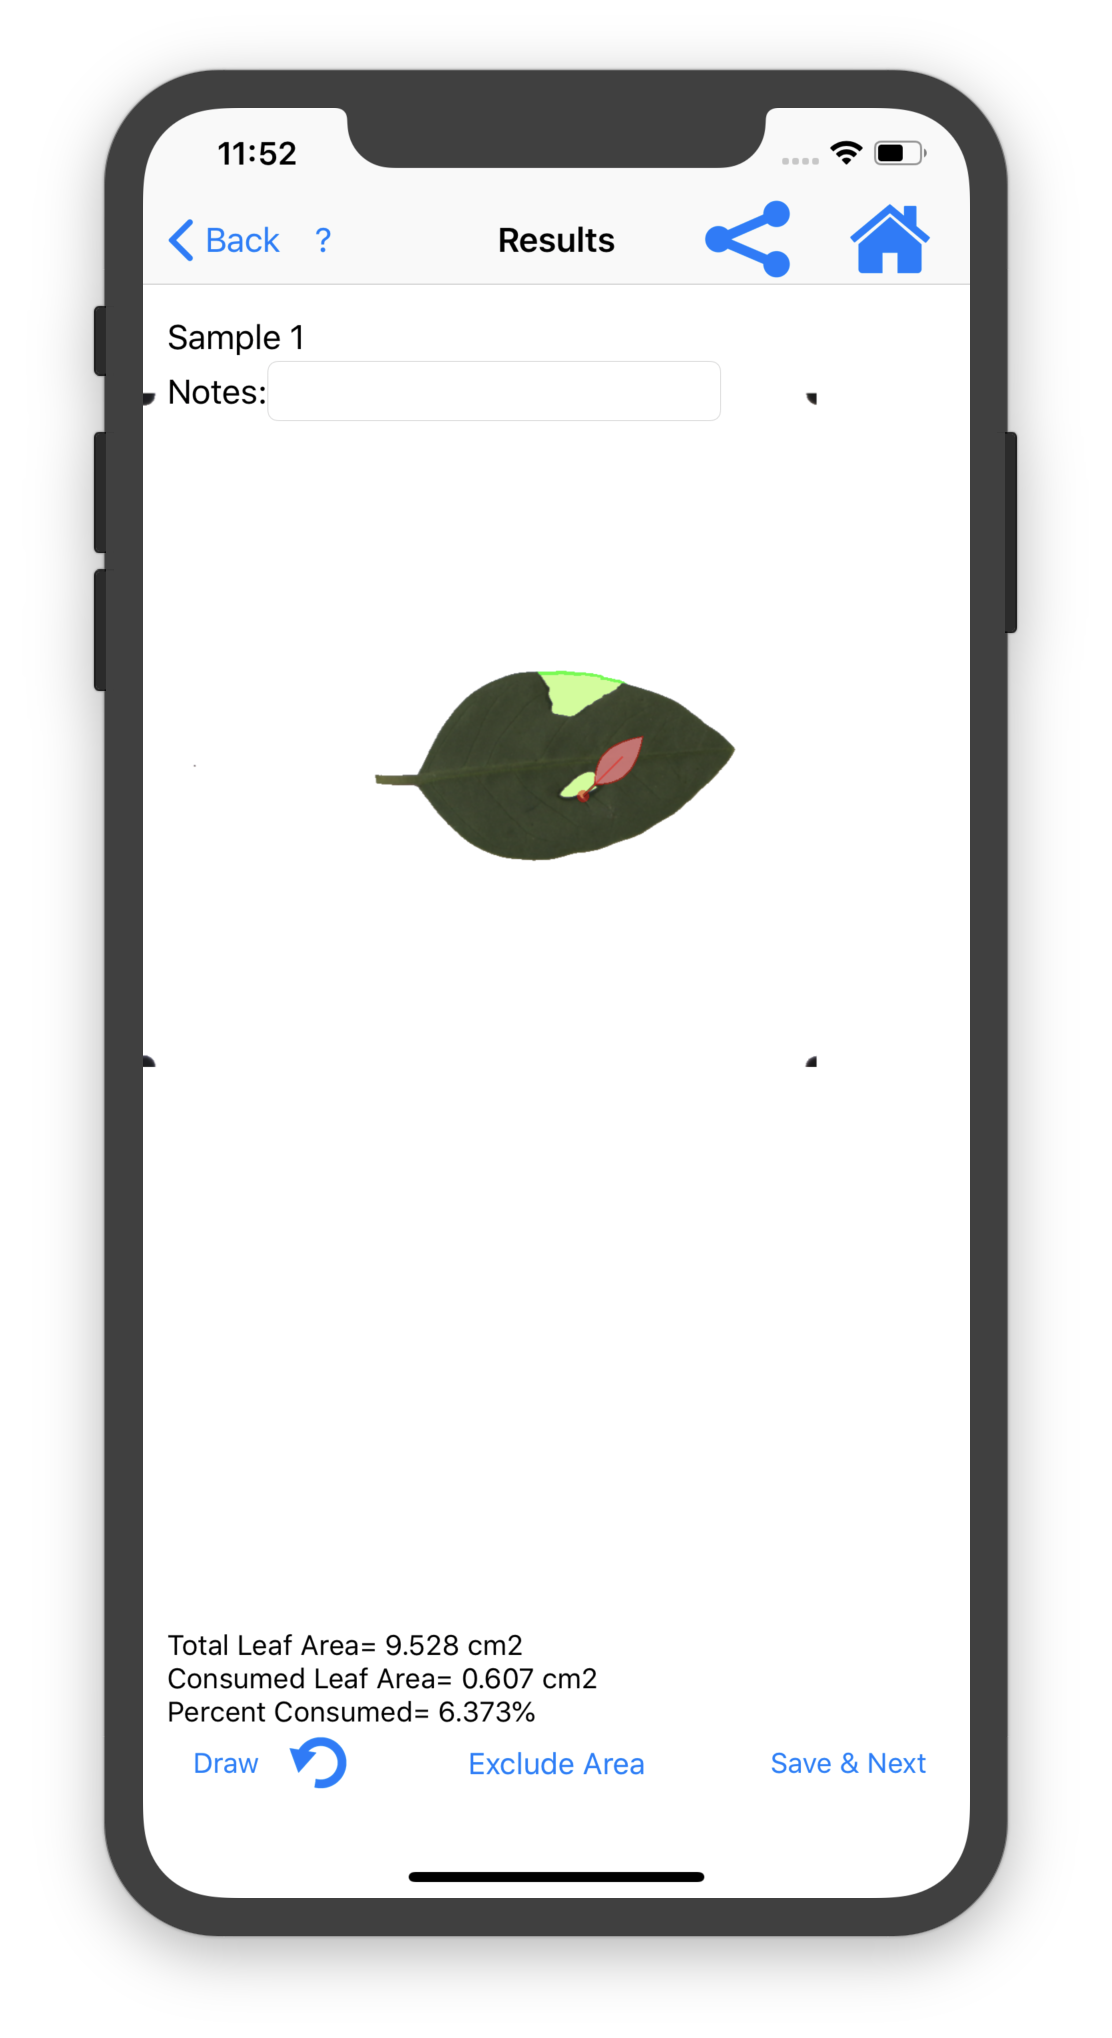
Results
Finally, you’ll reach the results. If you identified a scale, the image will have been cropped to the inside of the scale and distortion caused by the angle of the photo will have been corrected. LeafByte will use the scale as a frame of reference to determine the size of the leaf and the size of any holes in the leaf. Any holes in the leaf will be filled in with light green to show that they’ve been measured, and the results will display at the bottom. Notes can be added in the top left corner and will be saved in the spreadsheet with the rest of the data when you touch Save & Next.
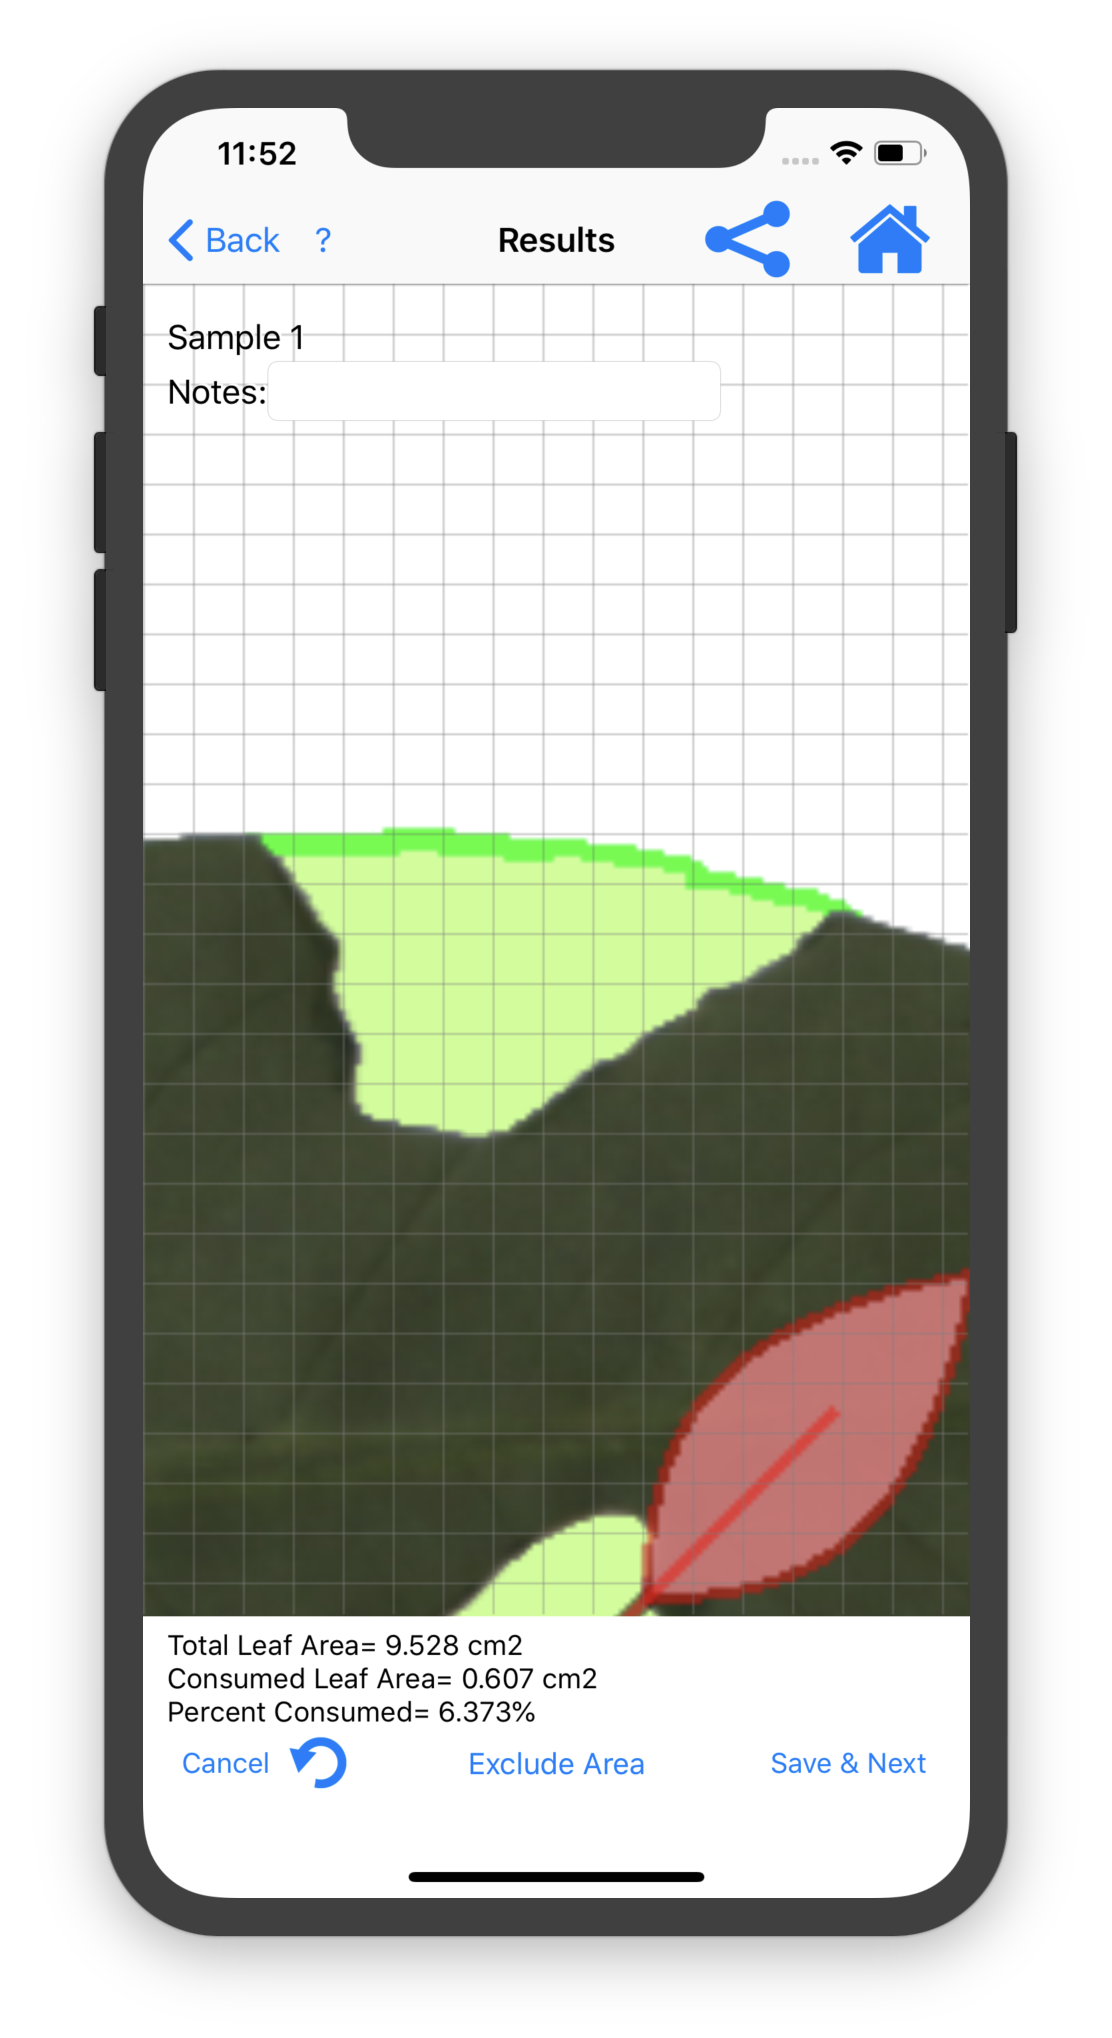
LeafByte cannot automatically fill in damage to the margin, but you can touch Draw and then draw the original margin back. LeafByte will then fill in and measure any enclosed areas. To ignore an enclosed area (e.g. the space between leaflets and a stem), touch Exclude Area and then touch the area to exclude. The Undo button can undo any number of drawings or exclusions.
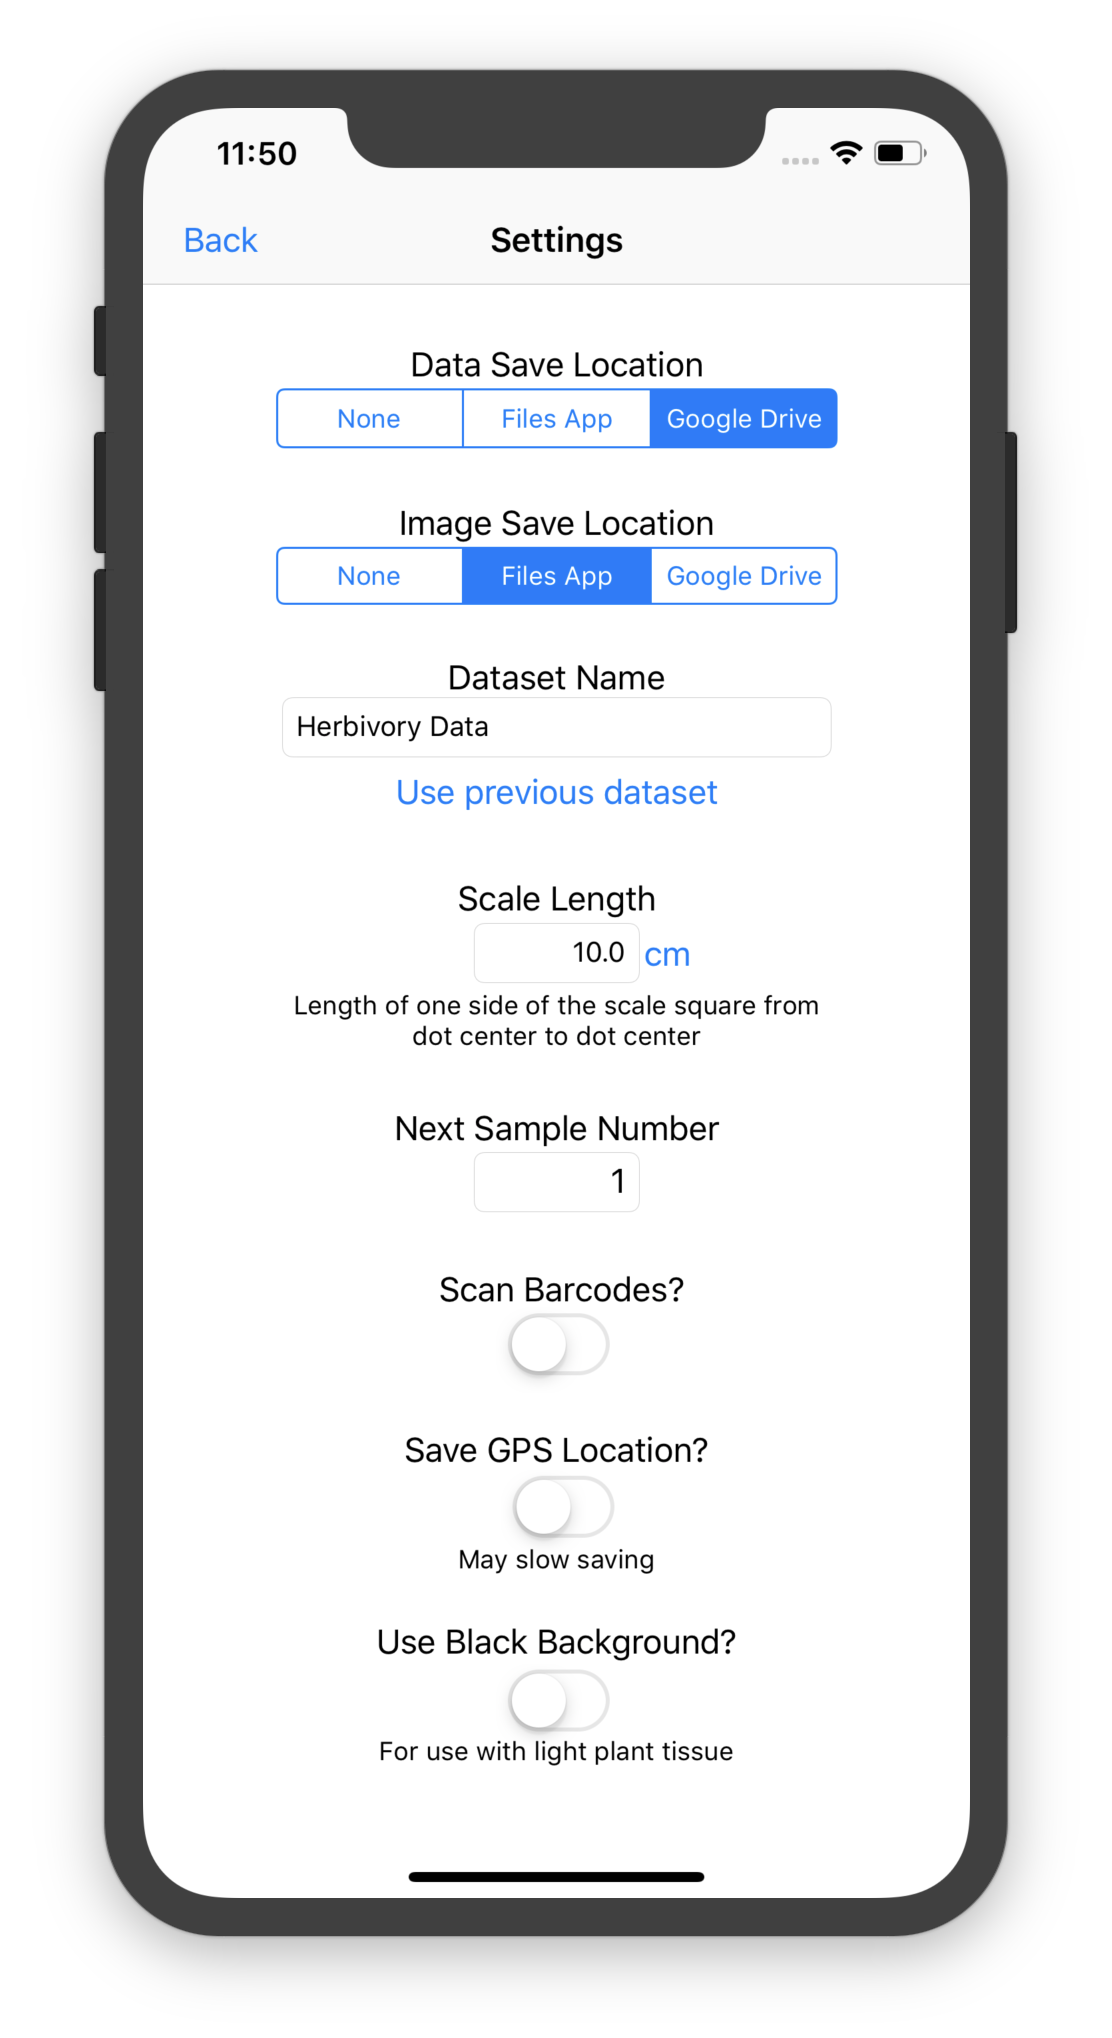
Settings
From the home screen, you can also choose Settings to reach a page of settings for the app:
- Data Save Location chooses where the spreadsheet of data is saved. The choices are to not save at all, to save to the Files App, or to save to Google Drive.
- Image Save Location chooses where the original images are saved. The choices are to not save at all, to save to the Files App, or to save to Google Drive.
- Dataset Name chooses what to title the saved spreadsheet and images (previously used names are saved in order to easily append to that data).
- Scale Length specifies how far it is between the centers of two dots on a side of the scale square (you can also change the units).
- Next Sample Number determines the sample number associated with the next image to be processed and automatically counts up. This can also be changed throughout the process by touching the current sample number.
- Scan Barcodes? determines whether a barcode should be scanned before each time a photo is taken (the barcode info is recorded in the saved spreadsheet). Leafbyte can read most common 1D and 2D barcode formats.
- Save GPS Location? determines whether GPS info should be recorded with each data point. Note that getting GPS info may slow saving.
- Use Black Background? should be set if the leaf is light, while the background is dark.